Well, Here is it... MY FIRST EVER TUTORIAL!!! Please leave some feedback for me and let me know what y'all think... here we go!
These are the supplies I started with. SU cardstock, a plain paper bag and box from the craft store .The bag is 8 x 10 inches and the topper is 9 x 6 inches...

 After I cut the 9 x 6 paper, I folded it in half and laid it on the bag to see where it would look right... then I measured in 2.5 inches from the right and 2.5 inches from the left. I put a dot at each measurement to get ready to cut the slot for the handles.
 I cut down 1/4 inch at each dot and then connected the two cuts with my paper cutter. This will allow the handles of the bag to fit through the slot.
 Next, I randomly stamped the pumpkin image from DRS all over the front of the bag topper
 Then, I cut two ovals with my nesties in coordination colors,
stamped my sentiment on the yellow one and used my embossing and glitter pens to decorate the ovals.
 I got out my trusty crop-a-dile and set copper eyelets in the front and back of the topper to allow a place for ribbon to be tied! Here, I used large copper eyelets.
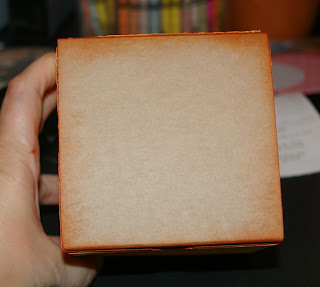
 I inked the edges of the box with orange ink so when my paper is on the box, it will blend in and match a little bit better. I also think it looks more finished this way!
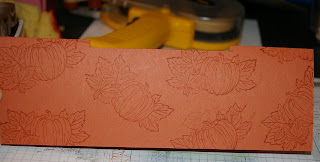
 I ran the paper for the sides through the cuttlebug and inked the design with orange ink to show off the embossing on the paper.
 I stamped this gorgeous image from DRS on the front panel and colored it with chalks... I LOVE this image and how Fall like it is! I can smell the turkey roasting and the cider mulling!!!
 AND... here it is! I hope you like it! This is SOOOO simple to make and this way I don't have to used tissue paper in the gift bag.(I NEVER can make it look right!) I really like how the box and bag coordinate and I think this will make a lovely gift to present to your Thanksgiving hostess or anyone you are thankful for! Think how darling this would look for Christmas as well! Enjoy your day!

 I got out my trusty crop-a-dile and set copper eyelets in the front and back of the topper to allow a place for ribbon to be tied! Here, I used large copper eyelets.
 I inked the edges of the box with orange ink so when my paper is on the box, it will blend in and match a little bit better. I also think it looks more finished this way!
 I ran the paper for the sides through the cuttlebug and inked the design with orange ink to show off the embossing on the paper.
 I stamped this gorgeous image from DRS on the front panel and colored it with chalks... I LOVE this image and how Fall like it is! I can smell the turkey roasting and the cider mulling!!!
 AND... here it is! I hope you like it! This is SOOOO simple to make and this way I don't have to used tissue paper in the gift bag.(I NEVER can make it look right!) I really like how the box and bag coordinate and I think this will make a lovely gift to present to your Thanksgiving hostess or anyone you are thankful for! Think how darling this would look for Christmas as well! Enjoy your day!


12 comments:
This is a great tutorial!! Love the fall theme ya got going on.....great for teachers!!
Fantastic tutorial! And GREAT projects!! :)
Awesome tutorial!! Thanks for sharing!
Great tutorial. Lovely projects
.
I always decorate these kraft bags but have never thought to put a topper on them...great idea! I love the finished look it gives the bag!
such a cool idea! and i'm w/ you on the tissue paper! lol! such a lovely set!
How very cute Dawn!! Love your tutorial!! TFS!! :)
Love, love, love it! Great job, Dawn!
Love the idea of the gift bag..so cute!! I am going to have to try these two!!!Thanks for sharing!
Great job. Love the set.
What a neat idea! Very good tutorial and lovely projects.
Pure genius!
Post a Comment